By Frank Iannamico
Every shooter is certainly aware of the recent increase in the price of ammunition; this substantial increase affects the machine gun owner far more than the average revolver or bolt-action rifle shooter. One way of saving a few dollars is by purchasing surplus corrosive ammunition, which is usually less expensive than its non-corrosive counterpart. In the past, the primary consumers of corrosive ammunition have been the belt-fed machine gunners, due in part to the enormous amounts of ammunition consumed by such guns.
Many transferable assault rifle and submachine guns owners have largely avoided shooting corrosive ammunition for fear of the corrosion damaging their expensive firearms; particularly gas operated assault rifles with difficult to clean gas systems. However economics are forcing many to take a second look at the corrosive, but cheaper ammo.
What makes ammunition corrosive is the type of primers used to ignite the powder charge. The suspect component is potassium chlorate (KC1O3), which is used as an oxidizer, providing oxygen to the primer compound. When ignition takes place the oxygen is removed from the molecule leaving potassium chloride (KCI). Potassium chloride is a salt and therefore hygroscopic (attracts moisture). When the residue from potassium chloride is left in a gun barrel it results in the formation of corrosion. Potassium chlorate is soluble in water; making water an ideal liquid to remove the corrosive salts, however, water if not completely dried out, can also cause corrosion.
Most U.S. military cartridge contractors made the transition to non-corrosive primers during the 1950 era. While most modern commercial ammunition is assembled with non-corrosive primers, the same is not always true for foreign ammunition, particularly surplus military cartridges and blanks. Reportedly, the advantage to using corrosive primers is that it extends the shelf life of cartridges, and it’s more reliable in extremely cold temperatures.
If you do an Internet search you will soon discover there are many conflicting “best” ways to clean your firearm after firing corrosive ammunition. After reading many of these, we decided to run a test of the many methods suggested; one piece of advice that I noted that was missing was regarding the removal of black carbon build up (e.g. AK gas pistons).
Purchasing Ammunition
Read ads carefully, if it doesn’t state that the ammunition is non-corrosive it probably is. Occasionally advertisers leave out this bit of crucial information.
Be wary of ALL foreign ammunition even if the seller or the box states that is non-corrosive.
If left unchecked, corrosive ammunition will cause a lot of irreparable damage to barrels and gas systems.
Check your firearm a few days after cleaning when shooting suspect ammunition.
Now that you have been warned about the pitfalls of corrosive ammunition, it really isn’t all that bad, as long as you are aware that the ammunition you are shooting is corrosive, and take the proper steps to clean your firearm as soon as possible after firing. The test pieces began to rust after 24 hours after being exposed, 72 hours later the metal began to pit.
Prevention Method Theories
Some of the more popular corrosion prevention methods out there include; 1. Firing several rounds of known non-corrosive ammunition before shooting the corrosive stuff. This will “coat” the components with carbon that will protect them from the ravages of corrosive ammo.
2. Firing known non-corrosive ammunition after firing corrosive ammunition to “blow out” the salt deposits left by the corrosive ammunition.
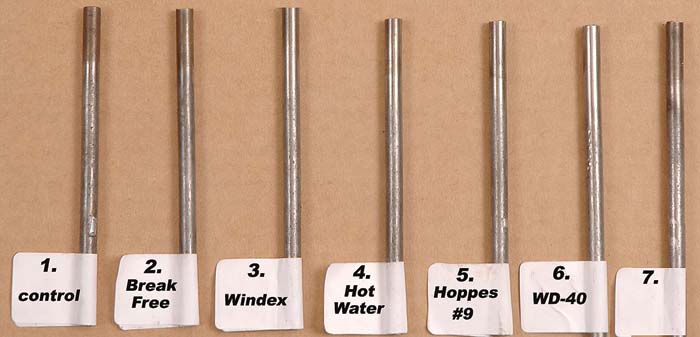
While the aforementioned methods sound logical and may help prevent or slow down the corrosion process, personal experience has proven that they don’t work very effectively. Corrosion will still rear its ugly head a day or so after shooting. (See photograph of test rod number 7.)
Disclaimer
The following testing was NOT performed in a laboratory under laboratory conditions. The tests were conducted by and for the amusement of the author only.
Be advised that there is no guarantee suggested or implied that the methods tested herein are 100 percent effective in the prevention of corrosion in firearms. The following tests were performed on steel rod stock, not actual firearms.
The Test
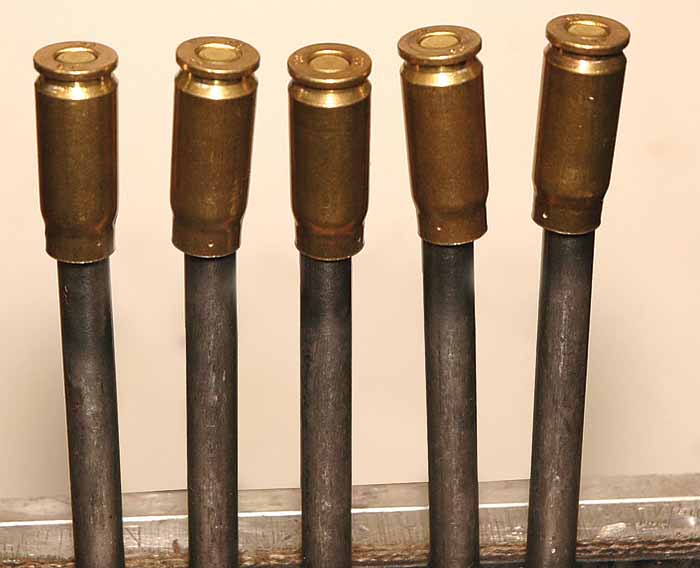
For the test, several mild steel rods .25 inches in diameter were used. The ends of the rods were polished on a wire wheel and cleaned with alcohol to remove any traces of oil. Each rod was placed vertically and secured in a bench mounted vice.
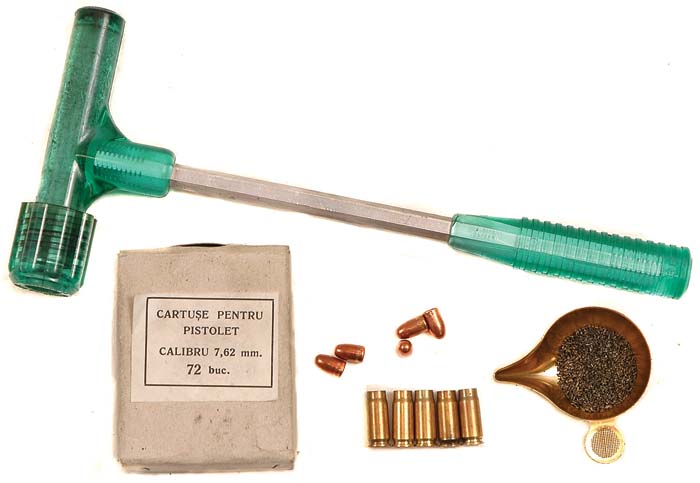
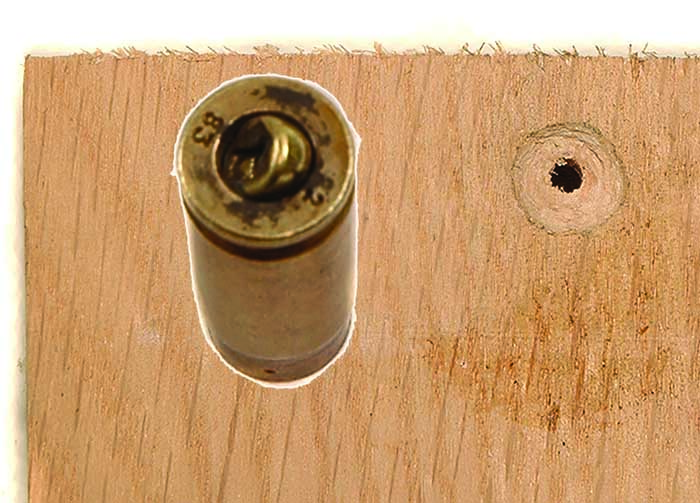
To prevent any potential injury, a piece of wood was prepared by drilling a hole for the insertion of a small nail that served as a “firing pin.” The tip of the nail was ground slightly so that it would not pierce the primers. A second hole the size of the cartridge case’s base was drilled approximately .125-inches into the wood to center the case under the “firing pin.” Eye and ear protection and gloves were worn during the test as when the primers are ignited they can fly out of their pocket in the case at sufficient velocity to inflict injury. Proper ventilation was also required.
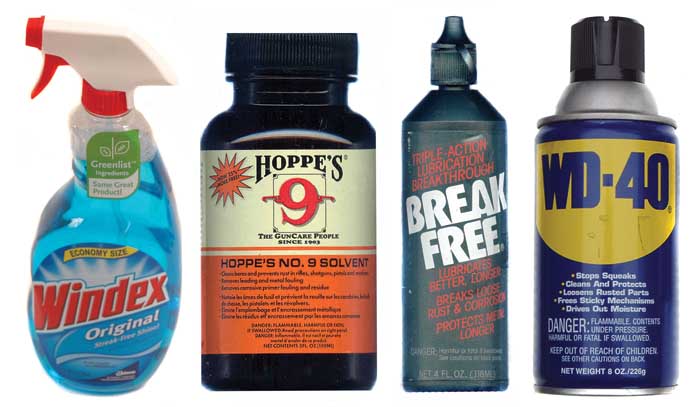
Surplus Romanian 7.62x25mm corrosive ammunition was used for the test. The bullets were pulled from several of the cartridges, the powder dumped from the cases and discarded. Each of the empty cases was placed over one of the steel rods. One primer was discharged on each rod. A time period of four hours was allowed to pass before the next cleaning step to simulate the shooters average time from firing until cleaning. After cleaning with each product, a period of 48 more hours was allowed before checking each rod for corrosion. The cleaning products used were; nothing (control piece), Break Free, Windex, hot water, Hoppes #9, and WD 40. One rod had a non-corrosive primer ignited on it followed by a corrosive primer.
The Results
Each rod was wiped clean with a rag coated with the product listed.
- Rod #1 not cleaned: Corroded
- Rod #2 Break Free: Corroded
- Rod #3 Windex: Rod did not corrode, but did develop light surface rust from the water in the Windex after a few days.
- Rod #4 Hot water: Rod did not corrode, but did develop light surface rust from the water after several days.
- Rod #5 Hoppes #9: No corrosion
- Rod #6 WD-40: No corrosion
- Rod #7 Non corrosive primer, followed by corrosive primer: Corroded
Note: The label on the Break Free container makes no claim for being effective against corrosive ammunition. The label on the Hoppes #9 bottle states “removes corrosive primer fouling and residue.”
Observations
To prevent damage from firing corrosive ammunition the parts must have any carbon deposits removed by a mechanical means; bronze bore brush, toothbrush or even a rag.
If left untreated the corrosive primers will result in the formation of rust on the metal within 24 to 48 hours. If cleaning is delayed until after the corrosion process has started, there usually will be pitting and black discoloration of the steel visible.
The humidity in the air has a great effect on how fast the steel corrodes. In other words, shooters in Florida have a smaller window of time to clean their firearms before corrosion starts than a shooter in Arizona.
Cleaning of the steel with petroleum based Hoppes #9 and WD-40 did not “trap” the salts underneath and corrode the steel. Both of the rods were examined daily for three weeks after the initial cleaning with no formation of corrosion.
Boiling water worked very well and evaporated quickly.
Any parts exposed to the cartridge gases should be cleaned, particularly on blowback, open-bolt guns; the bolt face, inside of the receiver and feed lips of the magazines should all be thoroughly cleaned of powder residue.
After neutralizing the corrosive salts from the ammunition, the firearm should be cleaned and lubed using standard procedures.
Recheck the firearm several days after initial cleaning for signs of corrosion.
| This article first appeared in Small Arms Review V12N9 (June 2009) |


