By Richard MacLean
Ultrasonic cleaning units can be a tremendous time-saver and can perform certain operations that are all but impossible using solvents and manual brushing. But they also come with potential issues. Not surprisingly, there are hundreds of opinions about ultrasonic cleaning on the firearm forums. They cover the spectrum from favorable to very negative and from sensible precautions to absurd recommendations.
Why all the disagreement? Many of the key warnings and relevant instructions are either absent from the manufacturers’ literature or mentioned briefly. Just as significant, the reasons behind certain precautions are rarely explained and these warnings are soon forgotten. Compound this dearth of information with the ego factor, “I’m smart and only need to glance at the manual,” and you have very unhappy individuals with ruined finishes on valuable firearms.
This article covers the background on ultrasonic cleaning, its evolution in firearm cleaning, and the current state of the technology. It summarizes proper cleaning techniques and essential tips provided by national experts working in the firearm industry.
The Origins of Ultrasonic Cleaning
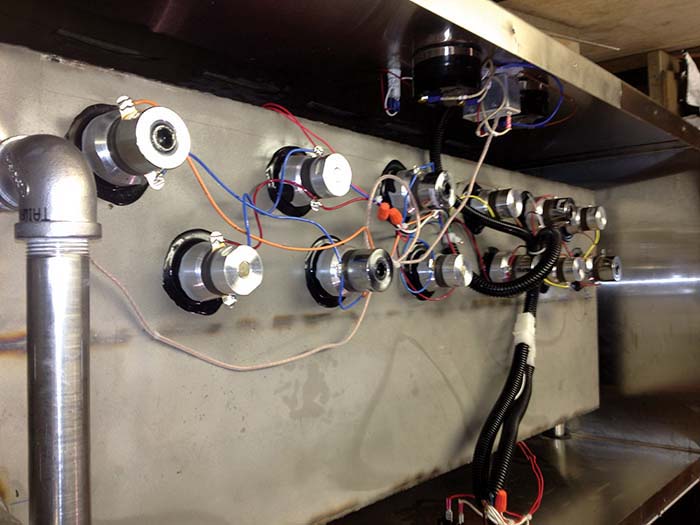
Bouncing sound waves off of underwater objects was first used during World War I for submarine detection. The energy levels and frequencies are considerably different than those of an ultrasonic parts cleaners but the principle is the same: electricity is used to stimulate a disk, which generates mechanical waves. Your stereo speakers or headphones perform a similar function, only in air and in the sonic hearing range between 20 Hz to 20 kHz. Ultrasonic is defined as frequencies that are above this threshold of hearing.
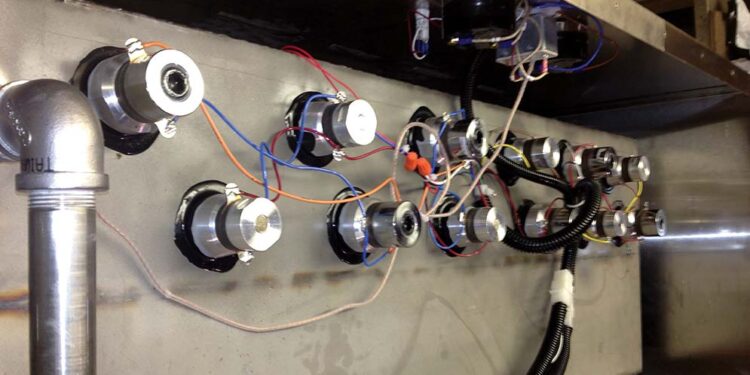
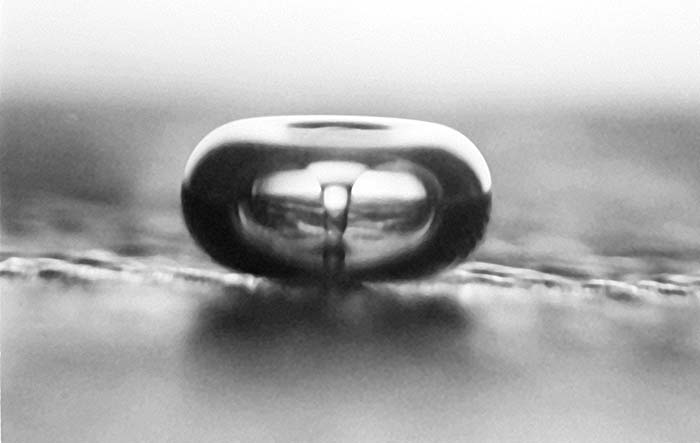
The waves alternately compress and expand the molecules of the liquid in which the generating units or “transducers” are attached. During the expansion phase, bubbles are formed that are invisible to the naked eye. The bubbles are subjected to enormous pressures during the compression phase and collapse with tremendous force. Their microscopic size and the large volume of liquid in which they are formed absorb and buffer this energy release. Cumulatively there are millions of bubbles that produce the desired intense scrubbing action.
The optimum frequency for ultrasonic cleaning depends on the application. Heavy parts in large tanks clean best at 25 kHz. The optimum for firearms is around 40 kHz. Clocks and medical equipment do best at around 68 kHz. And finally, disk drives and semiconductor parts require the upper limit of 170 kHz since higher frequencies penetrate better in the inner workings of delicate components. While it may appear contradictory, lower frequencies exhibit a much more aggressive cleaning action. The bubbles formed are much larger and when they collapse, the implosions are powerful enough to knock the sand off of metal castings.
Another important concept is power. In air it is measured in decibels or dBA. In ultrasonic cleaning the power is expressed as watts per gallon. The power (or amplitude) of the waves generated must be sufficient to cause the pressure in the liquid at the point where a bubble forms to be less than the vapor pressure of the liquid. A few of the factors that influence the required power level to optimize cavitation are the type of liquid and its surface tension and temperature. Most industrial cleaners have a watt density of between 50 to 100 watts per gallon. In general, smaller parts requiring more thorough cleaning need a higher watt density.
It is important to understand this distinction if you are in the market for a used industrial unit. A unit coming out of a dental office would probably work well on handguns and parts, but one used in the semiconductor or metal casting industry may not. Indeed, the aggressive action of low frequencies, in addition to the very harsh cleaning solutions and long emersion times in industrial applications, would ruin most gun finishes.
Firearm Ultrasonic Cleaning Evolves
In the very early days, these key parameters were not well defined for most cleaning applications, let alone firearms. Since the 1950s there have been scores of companies that have come and gone, but among the most widely known and respected brands in business today are Blackstone-NEY Ultrasonics, Blue Wave Ultrasonics, Bransonic, Crest Ultrasonics, GunCleaners Division of Police Products Corporation, L&R Manufacturing, SharperTek, Ultrasonic Power Corporation, and Zenith Manufacturing.
The ultrasonic cleaning industry in the early days was filled with optimism and by the 1970s some of these commercial units were being tried ad hoc for firearms cleaning. The results were disappointing because the overall processes specific to firearms cleaning had not yet been perfected. Specifically, the cleaning liquids were toxic (e.g., trichloroethylene), smelly (e.g., popular gun cleaning and ammoniated solvents), flammable (e.g., kerosene), and/or corrosive (e.g., strong caustics).
That started to change in the 1990s. By then, L&R Manufacturing was producing a product line specific to firearms. Interest was growing, but it took two major developments to shift the firearms cleaning landscape to what is available today. Greg Infante, President of Police Products Corporation (who markets his systems under the name GunCleaners), picks up the story from here, “In 1994 I was in a major police department as part of a weapons upgrade project. I noticed that the armorer had a Crest Ultrasonic unit containing what appeared to be a typical flammable gun solvent. Aside from the fire hazard, it smelled awful. I thought, ‘There has to be a better way.’
“Soon thereafter I contacted Crest and worked out an agreement to be their exclusive distributor for firearm cleaning units. One of the first challenges was to develop cleaning and lubricating solutions that were nontoxic, nearly odorless, and very efficient. In effect, we needed to hit the right balance between the power of the units and the aggressiveness of the cleaning solution.
“The next challenge was to develop the overall process parameters such as time in tank, rinse, lubrication, and drying procedures. A special water-removing lubricant was also developed to be nonhazardous, odorless, and nonflammable that removes water through ultrasonic energy by emulsification rather than displacement with a solvent.”
Simultaneous with the evolution of the chemistry and the process steps for firearms cleaning was the development of better, yet less expensive, hardware and tanks specifically designed to handle long guns. Internals became more reliable with new designs incorporating higher powered and longer lasting wave generators. Fabrication techniques improved to minimize the erosion of the generating diaphragms. Heaters became standard on firearm cleaning tanks. Foreign imports also had a major impact on putting these improved units within reach of any shooter. Indeed, small, inexpensive cleaners are currently available to clean brass for shooters. Both RCBS and Lyman now offer such units.
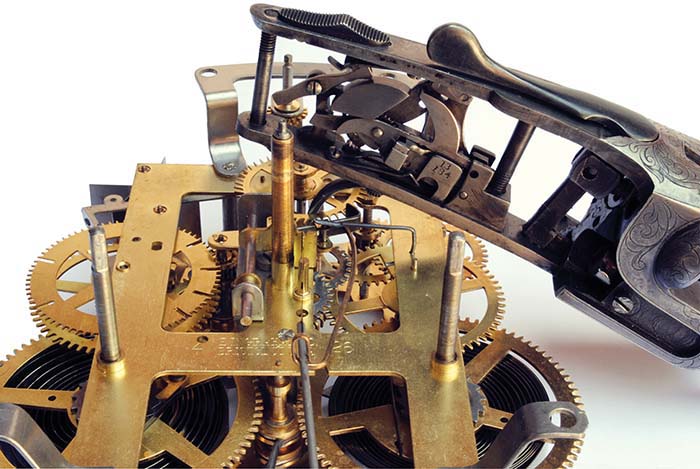
One of the additional benefits of owning an ultrasonic unit is that it can be used for so many other cleaning purposes besides just firearms and brass. It’s perfect for shooters who are mechanically inclined and have hobbies such as tinkering with old cars, especially carburetors, and antique mechanical clocks.
Current State – Going Very High Tech
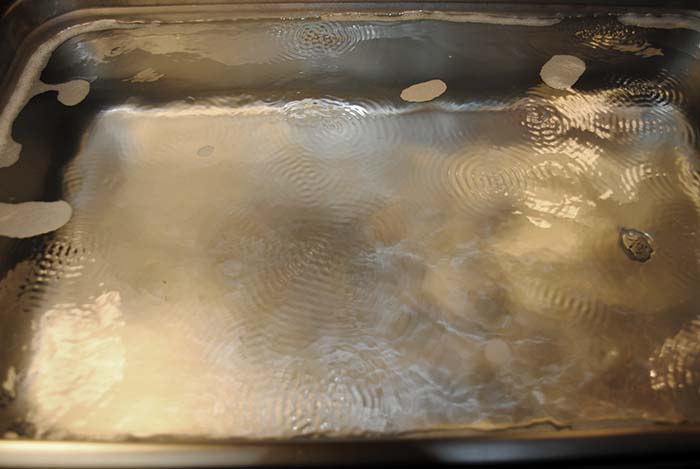
The original ultrasonic cleaning units could only generate a single frequency. Standing waves – the repeat bombardment of the same frequency wave to the surface location – can be an issue for parts that are very sensitive to cavitation attach, such as shiny, soft aluminum. Some units “sweep” the frequency over a few kHz range to help prevent standing waves and de-gas the solution from entrapped vapors that might reduce efficient cleaning.
This technology allows a set frequency (e.g., 40 kHz) to be raised or lowered about 2%. In so doing, it continuously changes the conical ultrasonic wave form and helps to reduce energy dead spots. High-end industrial cleaning systems were the first to incorporate this sophisticated feature, and now they are common on the larger firearm cleaning units used for rifles.
Another development was the invention of wave generators that send out two or more frequencies simultaneously, such as those offered by Zenith Manufacturing. Further innovation includes the use of arrays of two different transducers; each emitting a different frequency to cover a much broader range than a sweep frequency can deliver. Each frequency has a range of surface particles that it can best remove.
Yet another development was the invention of electronics to optimize the running frequency of a system, according to its natural resonance. The natural resonance depends on factors such as the transducer frequency, tank material thickness, cleaning solution properties, and other related system properties. Systems such as the SharperTek’s Auto-Tune and Auto-Track system continuously search for the optimal running frequency.
In very specific industrial application, all these new bells and whistles are essential. Large high-end firearm cleaning units, especially those large enough to clean rifles, often contain these features, such as Crest True Sweep and L&R Manufacturing’s SweepZone. But even for economical benchtop cleaners suitable only for a single handgun, the cleaning solutions, process, and hardware have never been better and priced so reasonably.
Using the Units Properly
Instructions for systems vary from manufacturer to manufacturer, but the basics are all the same. Firearms must be unloaded, of course, and for best results, field stripped. Removal of some types of grips, forends and stocks can be labor intensive, but if these are synthetic, they can stay on. Wooden furniture must always come off. The same applies to telescopic, electronic, and laser sights.
The cleaning solution concentrate should be diluted according to the manufacturer’s recommendations. Dilution ratios vary among products, thus one should consider the “true” cost when selecting a cleaner. Everything should be left unplugged until the solution is added. Running ultrasonic units empty or at below recommended levels can damage the transducers. Fresh cleaning solutions should be “degassed” of entrapped gasses by running the system for about five minutes.
There is an optimum temperature range to promote cavitation and while room temperature works, 120-130° F is ideal for today’s solutions. Temperatures as high as 150° F are possible, but the parts become too hot to safely handle without protection. Evaporation losses also increase and manufacturers such as Crest Ultrasonics do recommend elevated temperatures when the parts are coated with heavy greases such as Cosmoline.
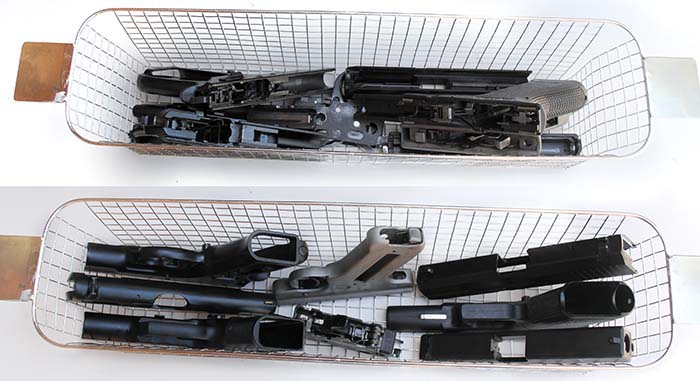
It is important that parts are kept off of the tank floor where the transducers are, in most cases, attached. Parts must be suspended and most units are supplied with stainless steel wire baskets made from square weave, 3 mesh, or lower stainless steel. There is a reason. Mesh above 50 acts as a solid to the ultrasonic waves. Suspension hooks from rubber and nonrigid plastics absorb energy and should be used sparingly.
The amount of loading also affects performance and tanks should be filled to less than half the weight of the water volume. For example, if a unit’s capacity is two gallons or about 16 pounds, no more than eight pounds should be loaded. Another guideline is that the cross-sectional area of the parts should not exceed 70% of the tank’s cross-sectional area. Just like doing loads of household laundry: two small loads get the wash cleaner than one large load.
The parts in the basket should be tipped to release trapped air. Slides and receivers should be placed dirty side facing down. Revolvers should have cylinders open and ejectors held open with some object such as a coin. For best results, hammers should be cocked during half of the cycle and down the remaining time.

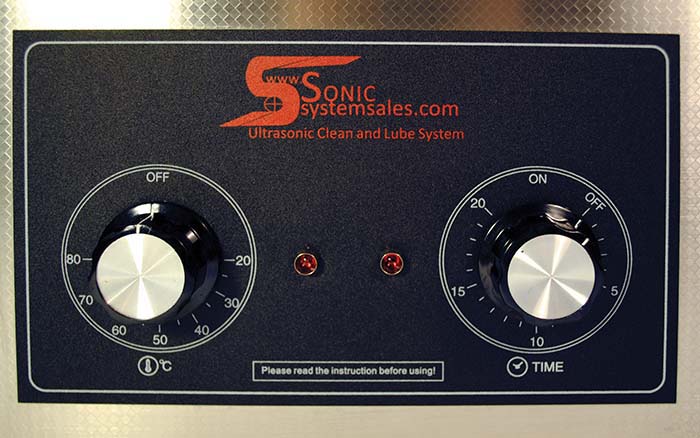
Now comes the most critical step: set the timer to no more than the maximum recommended time. This may be only five minutes for most firearms. For anodized, parkerized, baked-on paint finishes, and specialty finishes, the maximum time may be even less. If your unit does not come supplied with an internal timer, get an external in-line one and use it. Do not count on your memory to shut the unit off at the right time.
Non-baked-on painted finishes can be particularly sensitive to damage, including painted sights and cartouches. Indeed, manufacturers such as Crest Ultrasonics recommend that painted pictograms or cartouches be first coated over with a wax crayon. By the time the wax is ultrasonically removed, the overall firearm is done.
With ultrasonic cleaning, less is better. For extremely dirty areas and especially bores, some mechanical brushing and re-submersion for a few minutes will yield the best results. Problems occur when individuals assume more is better; and even the thickest of fouling will be removed without brushing.
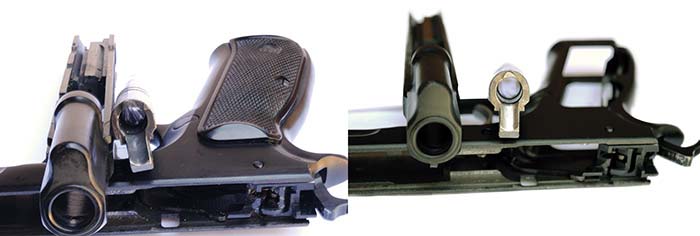
Once cleaned, the firearms are drained, rinsed with water, and dried. Again, there are variations on how best to accomplish this, including the use of compressed air. Common sense should be used. For example, the hardened gunk in the firing pin channel will be loosened, but unless it is mechanically scrubbed or blown free with compressed air, it will remain entrapped.
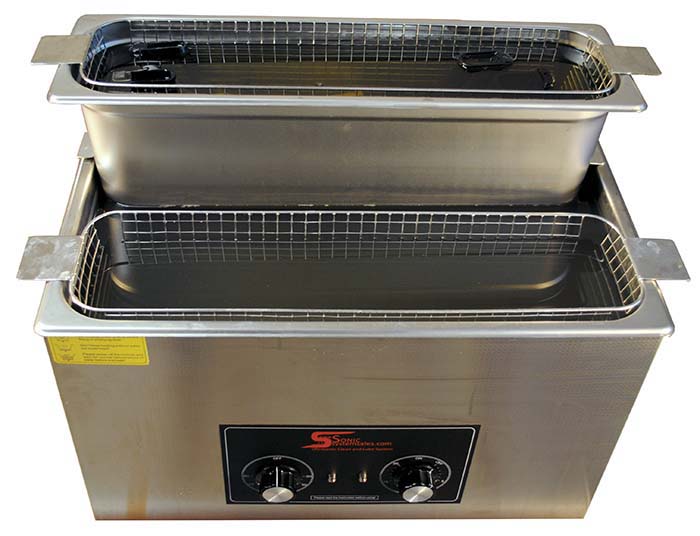
The next step is to coat the parts to displace any residual trapped water and provide a protective coating. Parts can be sprayed or submerged with a water-displacement solution that also protects and lubricates. But the best method is to place the cleaned parts into a basket suspended in a pan containing an ultrasonic displacement lubricant. This pan rests on top of the cleaning solution and the unit is run for several additional minutes. The ultrasonic waves are transmitted through the bottom of the pan into the lubricant.
Finally, the parts are drained and the excess lubricant is removed with a rag and, if available, with compressed air. The gun is then assembled and lubricated and/or greased according to the firearm manufacturer’s recommendation.
Controversy Over Damage To Finishes
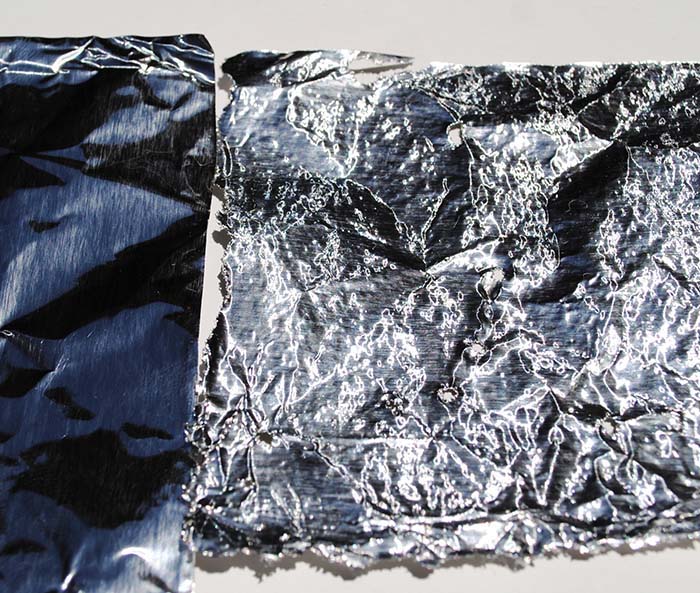
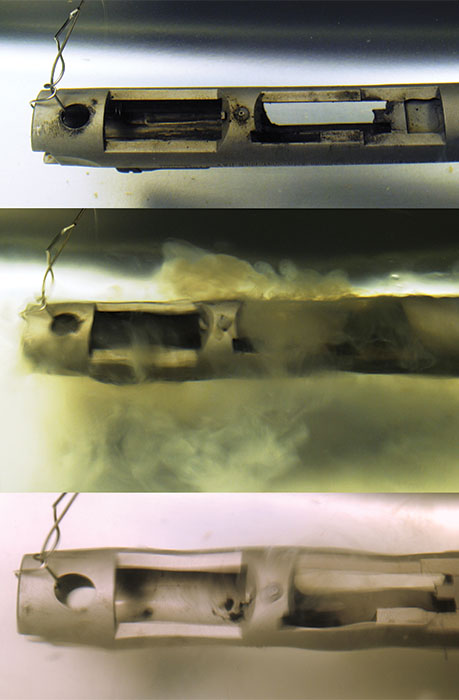
What are the facts? Yes, ultrasonic cleaning can cause surface erosion to some finishes. The extent varies from zero for stainless steel to significant for non-baked-on paints if the wrong cleaning solvents are used for long periods of time. Softer, shiny metals such as aluminum foil show the effect most dramatically. Weapons made from 7075 alloy aluminum with a hard anodized finish can also be impacted if all the wrong parameters are employed and the finish is not the best quality.
Monty Crain, head of Brownells’ technology group, states, “After cleaning our M16s and M4s about 10 times [typically made from 7075 alloy], you could see some of the anodizing becoming lighter, most likely due to a poor finish at the manufacturer. Those were probably because of extended cleaning times due to distractions while busy on other tasks.
“If you violate the canons of good gun cleaning and leave any surface in any cleaning solution too long, you will suffer the wrath. All ultrasonic cleaners will damage any painted surface within 15 minutes of submersion if it is not a baked-on finish. Fifteen minutes should be the rule of thumb on submersion for most surfaces because you are only loosening the grime, and some physical scrubbing is required to remove the particulates from the surfaces, both internal and external.
“All vagaries aside, it will also depend on the type and quality of the coating. I have left parkerized parts in for well over 15 minutes and all but a mere vestige of parkerizing was gone. Teflon/Moly, Aluma Hyde II, Dura Coat, Aluma Hyde, Spray Texture, Camo colors, and so on can be adversely impacted at times exceeding 30 minutes in certain ultrasonic cleaners and solvents. There are no standards for damage/time estimates as no destructive tests have been performed.”
Ultrasonic cleaner manufacturers recommend much less time-in-tank. Fifteen minutes, as stated by Monty Crain above, should be considered an upper limit never to be exceeded. Three-to-five minute durations followed by a little brushing and another minute or two in the tank will get the job done faster with little or no finish damage, according to Greg Infante of GunCleaners.
What about the major firearm manufacturers? Glock USA states that ultrasonic cleaning is not an issue for their line of products, as long as “non-ammoniated cleaners are used.” Both the polymer and the metal finish can be impacted if the wrong solutions are used. Ultrasonic cleaning solvents for firearms are typically advertised as alkaline biodegradable water-based solutions that are ammonia and caustic free. Glock USA also states that their tritium sights are not affected. Ultrasonic unit manufacturers recommend that these sights be positioned face up or away from the bottom of the tank for additional protection.
Sam Bass, Heckler & Koch’s Repair Manager for the U.S., states that their product lines are ultrasonic safe. “The most important issue concerning ultrasonic cleaning is to use the right solution at the right temperature and for the correct time. We have not seen damage from cavitation; if there is damage it is because of excessively harsh or caustic solutions. Yes, the paint inside the engraved cartouches can be gradually removed.” As stated earlier, some ultrasonic manufacturers recommend that these engravings be filled with wax crayon.
Sam discloses another key factor, “It is important to correctly position the parts in the tank. You should take a look at each part and determine the best path for the loosened gunk to flow out and away from the part. For example, when cleaning an MP5 trigger group, the unit should be placed vertically so the sediment flows down, especially if the trigger assembly is not removed from the trigger housing. This same concept applies to pistols and, in particular, the firing pin channels. These may need to be stripped and cleaned of the loosened gunk. What we have also seen is that the cleaning solvent and the oil trapped inside after cleaning may eventually react together and turn into something resembling pine tar. Obviously this can create a dangerous situation with regard to reliable firing pin function.”
What about the specialty finishers? Robbie Barrkman at Robar states that NP3 coatings are completely ultrasonic safe. Similarly, Chris Peters of Metaloy Industries states, “Ultrasonic cleaners, when used properly, will have no effect on firearms finishes, be it hard chrome, parkerizing, bluing, and the spray and baked-on finishes. I highly doubt these units damage gun finishes since they would not make their way into many police departments, military units, or small gun shops.
“What I believe is the problem is the improper use of the units. For example, not racking the parts properly, letting parts, frames, and slides touch while in the operating unit and scratching the finishes that way rather than because of the unit cleaning and doing its job. If not racked or put in a wire basket, the ultrasonic waves in the cleaning solution could possibly move or vibrate the parts together causing damage. I also doubt the manufacturer-supplied cleaning solutions are at fault since most water-based solutions are nontoxic and environmentally friendly. We recently purchased a small ultrasonic unit for other projects and for R&D purposes. It works very well. We have experienced no damage to our finishes or any others.”
Others within this community of finishers have strong reservations. Bob Ford of Bear Coat Gun Finishes states, “They can do significant damage to ‘coated’ firearms and aluminum. It’s called read the directions! With clean solvent they are okay. Most users do not filter or clean the material being used, trying to get as much mileage as possible out of it. With any buildup of trash in the solvent, a firearm sitting in the ultrasonic device will use the combination of ultrasonic vibration and contaminants as a grinding compound and will damage the firearm. We have had police departments all over the country send in firearms for rescue from such damage. Mostly SIGs, Colt ARs, and some coated firearms.”
What about the suppliers of sights? As previously stated, painted sights can be problematic unless pre-coated with wax. Tritium sights are less prone to damage. Glock USA has not had problems, and Trijicon states in a letter to Police Products Corporation that its sights are “impervious to oils and solvents, with the exception of any solvents such as acetone or ethanol that could have a negative impact” on the paints and cements used in their sights. Ultrasonic cleaners used “to clean a weapon with Trijicon sights will have no effect on the sights” unless the wrong solvents are used.
What about suppressor manufacturers? Modern suppressors are typically sealed units and, one would think, an ideal candidate for ultrasonic cleaning. But “cleaner is better” does not apply to suppressors. Tom Bowers of Bowers Group LLC explains, “The shiny internals of new suppressors are reflective. Some fouling will slightly improve performance. Of course, if the unit is literally plugged with material, the performance will be dramatically reduced, but we have rarely seen this under normal use.
“If a suppressor is significantly impacted with fouling and lead deposits, it is unlikely that ultrasonic cleaning would even work. Some suppressors are of ‘open architecture’ and more easily cleaned, even by ultrasonics, but some, such as those based on a K-baffle design, utilize voids with small access holes. Even if the fouling is loosened, much of it will typically remain entrapped and the suppressor cannot be completely drained. If the unit is entirely stainless steel, solutions can be used that will dissolve everything, including aluminum. You have to know the construction since some units have stainless on the outside but aluminum on the inside. It is best to let the original manufacturer handle service, and we don’t recommend cleaning of any type to our clients. People who have competing products should consult with the manufacturer for instructions related to those products.”
Another claim is that these devices may propagate preexisting surface cracks. Yes, if there are cracks, ultrasonics will “clean them,” but we have found no documentation of properly used ultrasonic cleaning propagating these further.
Features To Consider When Buying
If you are in the market for an ultrasonic unit, the first step is to map out exactly what you want to accomplish. For example, there is a major jump in cost if you want to clean rifles versus just pistols and small parts. There are also differences in the recommended process (i.e., how long each step should take, drying, use of compressed air, and so on).
Costs vary widely starting with tabletop imports for brass less than $200; to single pistol, one-gallon imported units at about $400; to $700 for two-gun units; to $1,700 for units large enough to handle seven guns, submachine guns, or rifle barrels. Domestic units are generally 30% (or more) higher with large rifle-size tanks costing over $5,000. Used industrial units can offer a distinct cost advantage, but they could prove to be a fool’s investment if they are not at the proper frequencies and power levels.
Another fool’s investment is to use homemade cleaning solutions. The factors that go into commercial cleaning solutions include deformers, dispersants, emulsifiers, inhibitors, and wetting agents. Fine if you are a chemist, but beyond the reach of most shooters. If you are using your unit to clean auto parts, by all means, make your own solution with a mixture of a cup of Simple Green and a tablespoon of dish detergent to about five gallons of water. It may work just fine. We provide this formula because if you should run across this or another cheap homemade ultrasonic cleaner in the context of firearms, watch out.
Conclusion
Which brings us to the key point of all this background information: cleaning firearms using an ultrasonic cleaner requires the right frequency, power level, and cleaning solution in a system properly loaded and operated for the proper length of time. If you go significantly outside this set of parameters, you may at best get little cleaning action, or at worst, wreck the finish on a valuable gun. If used properly, they can dramatically cut cleaning times and clean hard-to-reach nooks and crannies like no other method. Be they the manufacturers of the units or firearms, the distributors, or the coating companies, they all agree on this point.
(This article would not have been possible without the assistance of the following individuals, organizations, and companies: Bob Ford, Bear Coat Gun Finishes; Branson Ultrasonics; Chris Peters, Metaloy Industries; Crest Ultrasonics; Dr. Lawrence Crum, University of Washington; Fran Rickenbach, Ultrasonic Industry Association; Glock USA; Greg Infante, Police Products Corporation; Jennifer Dorywalski, Sharpertek USA; Lyman Products; Mike Kodner, Ultrasonic Power Corporation; Monty Crain, Brownells; Rachel Kohn, Tovatech; RCBS; Robbie Barrkman, The Robar Companies; Sam Bass, Heckler & Koch USA; TechPlate; Tom Bowers, Bowers Group; Trijicon.)
Do’s:
- Follow the manufacturer’s instructions to the letter.
- Closely monitor performance to further refine your own cleaning process; there is a learning curve where you will see what the system can and can’t do.
- Use commercial solutions specifically designed for firearms.
- Fill the tanks with the power cord unplugged.
- Use in a well-ventilated area.
- Disassemble as far as practicable.
- Keep the parts properly spaced and suspended above the bottom.
- Follow local regulations for spent solutions that may contain lead.
- Get the loosened gunk out of trapped areas either by disassembly and mechanical cleaning or by using compressed air.
- Thoroughly rinse and dry parts and immediately coat to prevent rust.
- Lubricate as per the firearm manufacturer’s recommendations after cleaning.
- Filter the solutions and clean your tank routinely; the manufacturer’s recommendations should be the minimum.
- Make up evaporation loss with fresh water.
- Check pins and screws that may have loosened up after the crud was removed.
- Wash hands; the solutions may contain lead
- Before you buy a used industrial unit, do the necessary research to check if it has the proper operating frequencies and power loading.
Don’ts:
- Work outside the recommended cleaning times.
- Use homemade solutions.
- Overload the tank.
- Place wooden “furniture” in the tank.
- Smoke while operating the unit; the solutions may contain lead.
- Put hands directly in tank when it is operating.
- Use compressed air to blow out gunk at such a high pressure that it atomizes the cleaner/lube and creates a health hazard.
| This article first appeared in Small Arms Review V18N1 (February 2014) |


