By J.M. Ramos
I had the privilege of meeting the great gun inventor Maxwell G. Atchisson at his residence in Doraville, Georgia, back in the late 70s through Donald Thomas. Don was Atchisson’s business agent at the time and is also SAR’s archivist. Visitors to Max’s residence were received via strict invitation only, since it was also his private research, development and testing facility. His guest book (to which I had the honor of adding my name) contained the names of dignitaries and high-ranking military officials from around the world—proof of his status as one of America’s best in the 20th century. The lower section of the house had an indoor range facility where guests were allowed to shoot Max’s inventions (except guns in the prototype stages with patentable features), many of which had never been shown to the public before. Some of the guns he presented and tested were his Vietnam-era M16 rifle containing his .22 conversion kit and three .22 semi-autos he converted to select fire, namely the H&R Reising M65 “Leatherneck” rifles and Jager AK22 (just introduced to the U.S. market at the time). The biggest surprise of my visit was seeing and firing his revolutionary full-automatic shotgun with a 20-round drum magazine. I also glimpsed a prototype 40-round drum in the works but was unable to test and examine it. Although Remington did come up with a select fire conversion of their M1100 shotgun, which earned the U.S. military designation M7188, it was Atchisson who truly revolutionized the concept that inspired many of the modern combat shotguns we see on the market today.
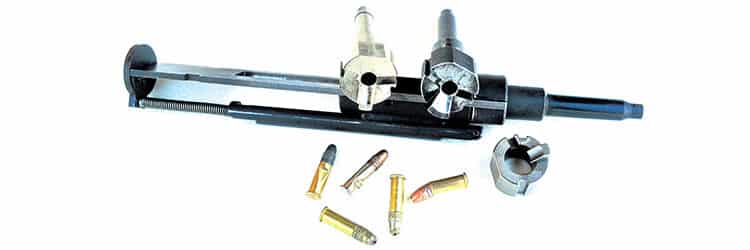
Although Atchisson’s inventions were mostly geared toward military and police purposes, such applications proved quite elusive, including for his much-touted full-auto shotgun. His AR15/M16 .22 conversion kit, on the other hand, became a commercial success years after he sold the rights to others. It was one of the most copied devices in existence and constantly improved upon by others, primarily by CMMG, the leading producer of these types of kit, who came up with various set-ups and related accessories. Since its introduction in the early 70s by Military Armament Corporation (MAC), the Atchisson .22 conversion kits have been produced by various manufacturers, including Jonathan Arthur Ciener, Brocal Inc. (WAC), Spike Tactical, CMMG, Tactical Solutions, Tactical Industries, Stag Arms, Mega Arms and others. The kits were offered as drop-in or dedicated uppers. The drop-in type utilized a chamber adapter, while the dedicated type was normally a complete upper with a .22 rimfire barrel. For accuracy purposes, dedicated uppers normally perform better than the drop-in installed on AR15/M16 (.223 caliber) since its rifling specs are not for .22 caliber long rifle rimfire. When used in a .223 rifle, the kit will tend to clog the barrel gas port with lead after prolonged firing with rimfire rounds and can affect the operation of the gun once it is switched back to its original caliber. To minimize this problem, it is best to fire a few rounds of .223 for every hundred .22LR. This will help to keep the gas port clear of obstruction. However, the gas tube still needs to be scrubbed due to the build-up of lead particles.
In the past 40 years, various .22 conversion devices for the AR15/M16 have been offered by such companies as Colt Industries, but the Atchisson device remains the undisputed leader. What makes the Atchisson device more attractive than others is its high capacity magazine (other kits normally boast 10-shot), available for both semi-auto and select-fire models and good reliability with the right ammunition. The Atchisson kit is a well-designed unit for its intended purpose. Just like its competitors, however, its reliability varies from one maker to the next, even though the parts (in most cases) are interchangeable. My first Atchisson kit, purchased 25 years ago, was marketed by Bro-Caliber and made by WAK Inc., followed by the Colt kit designed by Henry Into, Colt’s chief engineer in the 80s. Five years ago, these two vintage kits were joined by the Spike Tactical and CMMG version for my test and target practice. It has been noted that the old and new kits still share the following same basic malfunctions:
- Empty shell getting caught uderneath the charging handle groove and bolt during recoil with the top round loaded halfway.
- Failure to feed—normally a bent cartridge preventing the bolt from moving forward.
- Hammer follow and misfire—double or triple shots/light dent on the rim of the cartridge.
- Failure to extract the empty shell.
- Failure to complete cycle.
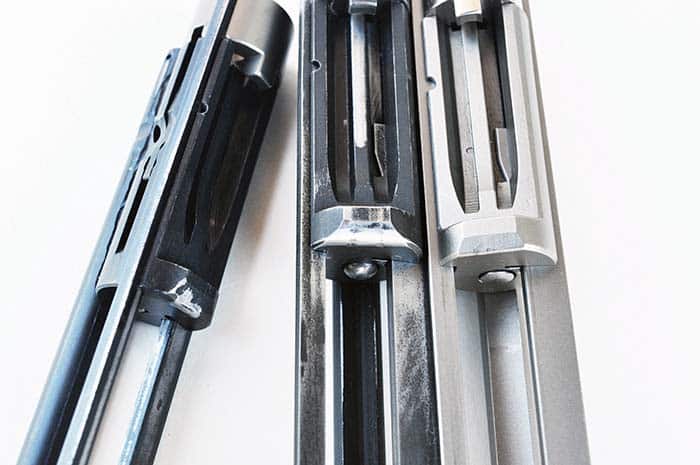
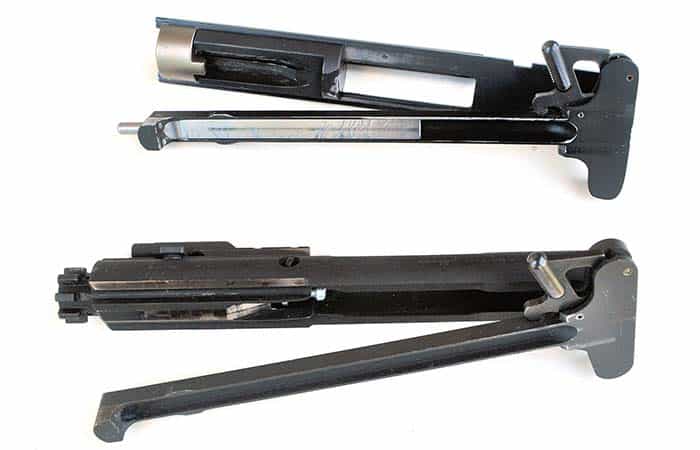
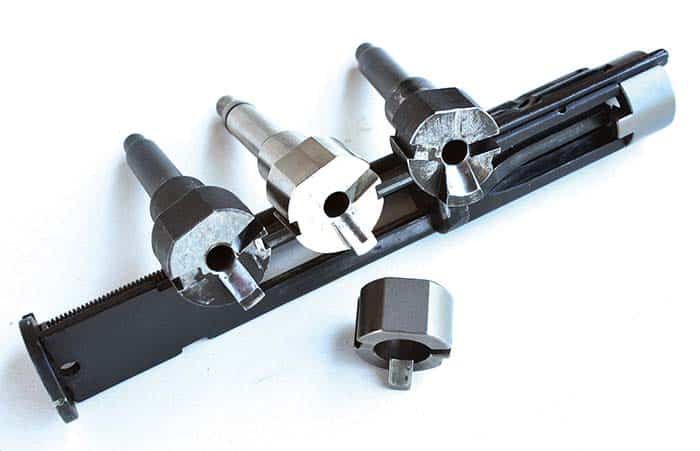
Among the five problems noted above, it was the empty shell getting stuck between the charging handle and bolt that proved to be the most bothersome to clear. This is especially difficult when, at the same time, you have a double feed with a halfway-loaded round locked with the round just coming out of the magazine. This malfunction also happened using the Colt kit on numerous occasions. Having experienced this problem with the WAK kit firing both standard and high velocity rounds on many occasions after acquiring it in the 80s, fixing the pesky bug became a priority. After some careful analysis and tinkering, the solution to the problem came into light. A drawback of this solution, however, was that it required disassembly of the gas tube each time the gun is fired with rimfire ammo. In addition, a plug to the connection port of the gas tube was required to seal the gas pressure in the barrel. This part is easy to make using a drill rod the same size as the gas tube, 2 inches long. Ideally, it is best to build a complete dedicated upper just for shooting .22 ammo using the modified charging handle. The modified charging handle will require filling in the underside grooved section. CMMG currently sells what they call an “anti-jam” charging handle made of glass-filled nylon for dedicated .22 conversion units. The usual deep underside groove was replaced with a shallow groove, but the front-end section for gas tube clearance for kits utilizing chamber inserts was unchanged. Since there is still an open space at its critical point, it may not completely eliminate the chance of empties getting lodged between the bolt and charging handle, but it minimizes it to the point that overall reliability is greatly improved. It is definitely a great improvement to these kits. Remember, the handle does not move with the bolt when it recoils, which leaves the open section at the front of the handle still exposed for the empty to get lodged at any given time. A better solution is to cover at least three-quarters of the charging handle underside groove starting from the front, leaving no gap for empties to get caught during operation. This requires obtaining a separate charging handle for this purpose and keeping the original when switching back to .223 caliber. You need not buy an expensive spare; get the cheapest you can—even a used one will do. To make a filler for the charging handle groove, you will need a 5/16 dia. steel or aluminum rod. Mild steel material is ideal here. Aluminum being softer can still be subject to faster wear, dings and scrapes. The steel material provides smoother operation and lasts longer. The minimum length of the filler required is 4 inches, but you can cover the full groove if you wish. A grinder and file are needed here. The thickness is .200 inches, with the top of the filler approximately .050 inches below the rim of the groove to compensate for the radiused section of the recoil spring housing, allowing the bolt to cycle freely with a minimal gap. The filler is pinned into place at the front-end section of the handle by a 1/16 diameter roll pin. The pattern of the filler used here has an extended section (reduced diameter) at the front that loops with the gas tube hole of the upper for better stability. This part will only work with the gas tube removed to allow the kit to seat properly into place. The modified handle will work perfectly with other dedicated .22 uppers without a gas tube.

Failure to feed can be associated with a faulty magazine follower and spring. A malfunction of this nature normally happens when the magazine is fully loaded and the top cartridge nose-dives while being pushed forward by the bolt. A simple test is to simulate a loading sequence by pushing out the loaded rounds with a small wood dowel and see if the cartridges are moving upward unimpededly. If not, check the follower and inside the magazine body for obstruction or mold overruns and polish them with medium-grade grit until the tightness is eliminated. Check also the spring for binding and straighten it up. If no binding is experienced during this test, check the feed ramp for roughness and sharp edges. The ramp should be polished smooth and the chamber must accept the cartridge without hesitation or tightness. The cartridge should go in freely and be released from the chamber freely. Another area to check is the looseness of the magazine when inserted into the gun. Looseness in fore-and-aft movement of the magazine is also very critical during loading. When the bolt moves forward to load theAtop round from the magazine, it will exert pressure and cause the magazine to tilt slightly forward, thereby causing the bullet being chambered to point toward the bottom of the feed ramp instead of upward toward the chamber. This would normally result in a jam, with a bent cartridge loaded halfway into the chamber. A quick remedy for this is to tape the rear upper section of the magazine to minimize the loose fit. Brownells’ vinyl-coated cloth tape is ideal for this purpose and comes in black and coyote brown color. Taping should prevent the magazine from falling freely but leave it loose enough to be pulled out easily when reloading.

Hammer follow is normally associated with using older units with a notched (Colt type) hammer, although this may vary from one make to another. This hammer will work fine in some ARs, while it won’t in others due to dimensional tolerances. For example, the old WAK kit will not depress the notched-type hammer far enough to engage the secondary sear on vintage models but will work fine with (most, if not all) newer ones. The underside of the bolt appears higher. When installed to vintage ARs, the WAK kit will not work reliably with the Black Dog magazines except the steel Ciener type. This is also the reason that this vintage kit is not compatible with a notched hammer. Hammer follow tends to create a dangerous runaway gun firing double, triple and even continuous full-auto fire (deemed illegal by definition, although unintended) followed by misfires with a very light dent on the rim. Misfires occur when the hammer hits the bottom corner of the bolt, not the back of the firing pin. If your AR has a notched hammer and is experiencing this kind of issue, the simplest remedy is to replace it with the (unnotched) MIL-SPEC type along with a reduced power spring kit (both available from Brownells). This will not only smoothen the action and lighten the trigger pull, but will also lessen the resistance to the bolt during recoil, which in turn permits the use of a stronger recoil spring for more positive bolt closure. In most cases, light recoil springs also contribute to misfires as they create a gap between the breech face and barrel chamber as the bolt tries to overcome the resistance of the extractor hook resting against the inclined barrel notch. To overcome this, some manufacturers resort to using a weaker extractor spring in conjunction with a lighter recoil spring to allow the bolt to close, which is a serious drawback that will result in extraction problems. It is best to keep everything strong and find the right ammo and magazine to work with it.

Failure to extract the empty shell normally occurs once the gun is heavily clogged up. However, if the gun fails to extract even before this stage, check the condition of the extractor itself with the following simple test. Place an empty shell in the breech face with the extractor holding it in place. With the bolt underside facing down, lightly tap the center point of the bolt on a table. If the extractor is good, the shell must not fall or come off. If it does, replace the extractor if the hook is worn out or barely engaging. You may gradually file the bottom section of the hook that rests over the bolt to increase the contact point of the extractor with the rim. The spring must also have enough power to positively activate the extractor. If everything looks fine with the extractor, focus your attention on the chamber itself. Some chambers may not be reamed or finished properly and could be tight and unpolished. It should also be checked that the notch for the extractor on the chamber adapter or barrel is cut properly. If the extractor hook is sitting high or binding when the bolt closes, it will likely miss the rim and will jam the action.

Failure to completely cycle during operation can also cause other malfunctions, such as failure to eject and feed. This can normally be attributed to weak ammunition in relation to the recoil and hammer spring resistance. This can be further improved by simply modifying the square bottom corner at the rear of the bolt to a radius and polishing it smooth to minimize hammer drag and resistance. The combination of parts and polishing on certain areas is quite critical if the gun is to be fired with various ammunition. With readily available parts for the AR, solving reliability issues such as these can be done right with minimal effort. If the procedures mentioned above are followed correctly, your .22 conversion kit should work with utmost reliability no matter what type or make it is. For parts and accessories requirements contact Brownells (www.brownells.com).
| This article first appeared in Small Arms Review V21N7 (September 2017) |


