By Michael G. Dhooghe
So you ponied up the money for that original MG42 you always wanted, patiently waited for what seemed like years for the transfer to come through, and bought every accessory the German army ever had. You have a pallet of ammunition belted up and ready to go. So when the transfer finally comes through, you think you can just pack up the truck, head to the range, and blast away? Well, not so fast there, Hans. You might want to save yourself a few headaches by first reading the following saga about what my wife and I went through to get our MG42 to run…

In preparation for the arrival of our MG42, I wanted to make sure that I had everything I would need to immediately hit the range. I already had several cases of .308 on hand, but no 8mm, which is what our gun was chambered for. But luckily, one of the great things about the MG42 is the ease of caliber conversion from the obsolete 8mm to the popular .308. So initially, I opted to pick up the parts for the caliber conversion instead of buying some 8mm. I ordered a barrel, top cover, feed tray, and booster assembly from RTG Parts. I also had complete parts kits in both 8mm and .308, a post war ground mount, and an anti-aircraft (AA) tripod. If I needed a spare part, I had it. Lastly, I ordered two translated German MG42 manuals from John Baum. I was ready to rock.
The big day finally arrives and our new (to us) MG42 was delivered. What a glorious day it was as my wife watched me pull out of the box an excellent condition, World War II era MG42 covered in grease and oozing with history. As I began to field strip the gun, it was apparent that this gun had not been abused. The finish was blued and in great condition, with no major dings nor any rust. The trunnion (cam piece) was not chipped or damaged and all the rivets were tight. Because I had read tons of information, I knew what to look for – or so I thought. Yep, this was going to be great. I gave the gun a good cleaning and lube, and changed out the barrel, top cover, and feed tray, so we could shoot .308. I also installed a bolt catch to significantly reduce the chance of blowing up the gun. With several belts loaded up, everything was ready to go.
The next day, my wife and I headed out to the range. My wife is an avid shooter and those who know her know two things about her shooting habits. The first is she likes to lay on the trigger for long bursts until she is out of ammunition. The second is she has limited patience for tinkering with a gun. She uses shooting as her primary stress reliever, so it needs to work and work well. There will be no problems at this range session though. This MG42 is in great condition so it will run just fine, and all I brought were 50 round belts, so she was not going to be melting any barrels. I mounted the gun on the AA tripod, loaded up a 50 round belt, nestled the stock into my shoulder, and pulled the trigger. The sear released the bolt, which stripped a round from the belt, chambered it… and nothing. Hmm, I assumed it must be a bad round. I cocked the gun again, pulled the trigger, and the same thing occurred. Surely, I could not have had two bad rounds back to back. This was clean Portuguese surplus ammunition, which I have never had any problems with in the past. Third time’s a charm? Nope. With my wife hawking over the situation and anxiously waiting to get some trigger time, it was time to step back and take a look at exactly what was going on.
I picked up the rounds and inspected them. All three had light primer strikes and had failed to ignite. The gun was just cleaned so I knew that there was not any crud slowing the bolt down, nor was the firing pin being impeded by a clogged firing pin hole. I figured that although the firing pin had looked good, in reality, maybe it was a tad too worn. Luckily of all the parts I did not bother to bring, I did bring an extra complete bolt. I swapped out the bolt for one that looked like it was brand new. With the gun back together, and loaded up, I pulled the trigger. Bang… then silence. I cocked it again, pulled the trigger, and this time it did not fire at all. With my wife getting impatient, I tried it a few more times. Sometimes it fired, sometimes not, but when it did, it was only one round. Frustrated, I had had enough. The MG42 got put away and we blasted away with some other machine guns to reduce the tension. The wife was happy.
Once I got home, I disassembled the gun and began to go over the parts, comparing them to those in the parts kits to see if something looked amiss. Every part from the gun appeared to be in excellent shape and looked just like its counterpart in the kits; that is all except one: the recoil spring. The one in the gun was obviously shorter than the others I had. That had to be it! I put the gun back together with the newer recoil spring. After it was together, I gave the charging handle a pull. It was noticeably more difficult to retract compared to the original spring, but we would have to wait a week before we could try it out.
The week passed, and we got back out to the range to finally do some blasting with the historic piece. My wife had an especially stressful week, so she was ready to tear up a few targets – better them than me. With the MG42 on its tripod and a belt loaded, I settled in for a quick burst. Brrrraaap. I released the trigger and about three rounds had let go. With a proud grin, I informed my wife that it was now working and after I finished the belt she would finally get her turn. Hunkered down to ceremoniously finish the belt, I pulled the trigger, and nothing happened, not even the bolt releasing. In all my excitement, I did not realize that the gun had a stoppage a split second before I had released the trigger. I pulled the charging handle back and a live round came out with an empty case caught between the bolt and the extension on the charging handle that contacts the bolt. I figured it was a slight hiccup, no big deal, just blowing out some cobwebs so to speak. I cleared the gun and readied it for another firing. The same thing happened, a short burst followed by a stoppage with a live round partially chambered and an empty case stuck up in the receiver. This was no longer any fun. I had a gun that would not run and a wife who needed to shoot. I asked my wife to keep an eye on the charging handle when I tried the next burst to see if it might be vibrating loose and possibly giving some resistance to the bolt travel. Under her watchful stare, it remained forward, locked in place, just like it should be. Damn.
I gave my wife an MP5 to calm her down, while I went at it with the MG42. Maybe the problem was with the ejector or extractor. I had a total of three complete bolts with me, so I chose the bolt with the best looking extractor, and put in the newest ejector pin and ejector bar I had. No dice – it still would not run. Maybe there was a headspace problem and the bolt was locking up too tight. Since I did not have any headspace gauges with me, I resorted to trying each bolt with each of the two barrels I had with me. Every time I would get excited with anticipation that this would be the winning combination, and every time I was sorely disappointed with the same problem. By this time I was really getting irritated. Between changing out so many parts and the wind coming off the neighboring river, my hands were cold and stiff. While I was racking my brain trying to figure out what the heck could possibly be wrong, I noticed my wife smiling as she was emptying magazine after magazine into the berm. At least someone out here was happy.
Could it be that maybe the belts were too tight for the .308? I did recall some were easier to load than others, and I was still on my first belt. Since I had no way of knowing now which belts were the easier ones I loaded, I had to just start trying them. Belt after belt, I would try it at least twice, and then move on to the next one. I even tried a disintegrating belt of M13 links. I still could not get it to run. After the last belt, I opened the top cover and inspected the pressure plate thinking it might be the problem. Comparing it to one on a new cover I had, its spring pressure and shape were the same.
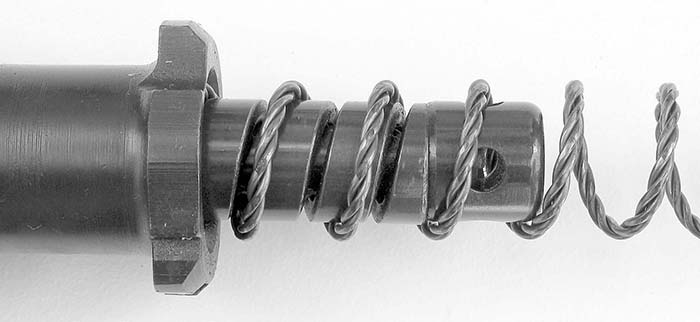
By this time my wife must have blazed through half of a case of 9mm, so she came over to presumably give me a hand. No such luck, she wanted the UZI. She did ask how things were progressing though. As I watched her pull out some UZI magazines, I noticed another booster assembly sitting there, but it only had two parts to it. Since an 8mm booster assembly has three parts, that one had to be for .308. All this time I had been running with the incorrect 8mm booster. Additionally, the .308 booster has a smaller exit hole, thereby allowing the escaping gases to impart a greater force to operate the gun. I quickly swapped out the boosters. And just as quickly, I found out that other than increasing the rate of fire a bit, it still malfunctioned. It was time to pack up and head home.
At this point, the only thing I could possibly think of was that maybe the recuperator springs needed to be changed. The recoil spring had needed to be replaced, so maybe these did too. I tried the German recommended field test, which essentially says that with the flash hider off, the recuperator springs should support the gun standing on its barrel bushing. It goes on to say with the gun pushed down on its muzzle, compressing the recuperator springs, they should be able to easily lift the gun back up. The assembly passed the test, but since I did not have anything to lose, I removed the recuperator assembly and shipped it off to Bob “Bubba” Naess at Black River Militaria for a rebuild. Before I packed it up though, I compared the spring pressure of it to the two spares I had. They all felt similar, but since my sense of feel is not calibrated to measure spring constants, I was not taking any chances.
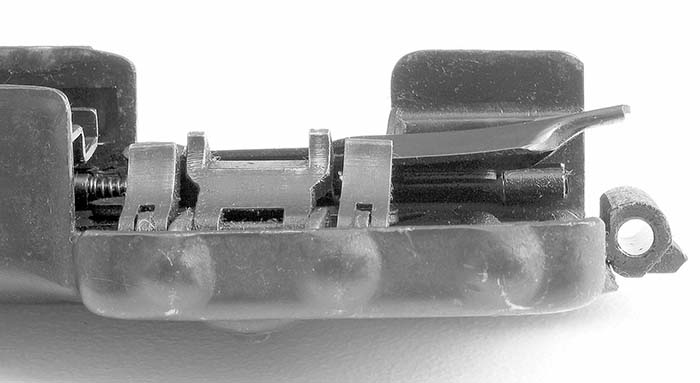
Fast forward several weeks to when I get the recuperator assembly back from Black River Militaria. The assembly was cleaned, lubricated, and had all of its springs changed. During the time our prized MG42 had been sitting idle, I was further educating myself about MG42s with every piece of reference material I could lay my hands on. Learning about how important the recuperator assembly is to the firing sequence, I was convinced that this was my problem. So without further delay, the rebuilt assembly went back into the gun.
That following weekend it was back out to range to finally give our MG42 the workout she was yearning for. After convincing my wife that we did not need to bring any other guns because we were going to be far too busy shooting the MG42 and refilling the belts, we loaded the truck and headed out. We got out to the range and started unpacking. So familiar was the ritual of unloading and setting up the MG42 from past trips that I was starting to get the sinking feeling that things might turn out with the same disappointing results. Maybe I should have brought some other hardware, just in case.
Loaded up with a fresh belt that I purposely chose because it was easily loaded, we were ready. Pulling the trigger, she came to life… for about four rounds, and then choked. My wife’s smile faded as she reminded me of my choice to not bring any other firearms because we would be way too busy shooting the MG42. I was at a complete loss. I had checked, replaced, and/or repaired every part on the gun. Or had I…
The checklist
So what do you check for when you first get that MG42? I would highly advise to first purchase at least one of John Baum’s translated MG42 manuals. They are worth their weight in gold. Next, review the following list of the more common things to check which will minimize the chance of problems:
- Cleanliness. This may be obvious to some, but make sure the gun is clean, especially the chamber and bolt guide rails. A quick test for chamber cleanliness is to hold the barrel chamber end up and drop a cartridge into it. The cartridge should be able to completely chamber itself under its own weight. Then, when the barrel is turned upside down, the cartridge should fall out by itself. To test the guide rails, remove the stock, buffer, recoil spring, and bolt. Then, with the gun tilted forward, and the trigger pulled, insert the bolt into the receiver and let it slide forward. It should freely slide all the way into the barrel extension. It should not hang up anywhere or encounter any significant resistance along the way. If there is a hang-up, check to make sure the rails are clean and free of any obstructions.
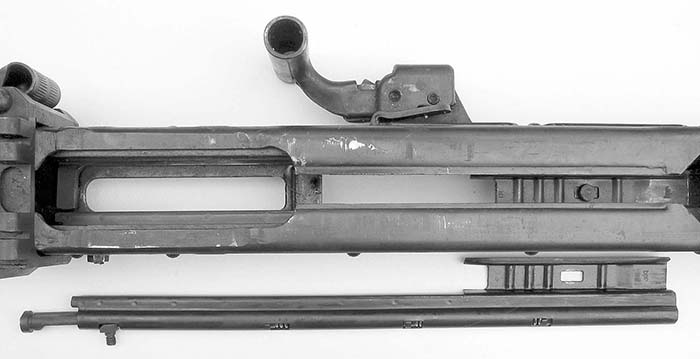
- Recuperator springs. The German operator’s manual recommends testing the strength of the recuperator assembly by removing the flash hider and standing the gun up on its muzzle end, resting on the barrel bushing. The recuperator springs should support the weight of the gun and not allow the barrel to move. The testing should continue by pushing down on the gun while in the same muzzle down position, then allowing the recuperator springs to lift the gun back up, putting the barrel into its extended position. The springs should be able to do this easily, although it is subjective as to what easily is. If there is any inclination that the springs may be weak, have them replaced. On every recoil of the gun, the barrel extension slams into the trunnion, damaging them over time. There is no way to prevent this; it is inherent in the design of the gun. If the recuperator springs are weak, the barrel hits the trunnion with greater force, thereby accelerating the damage.
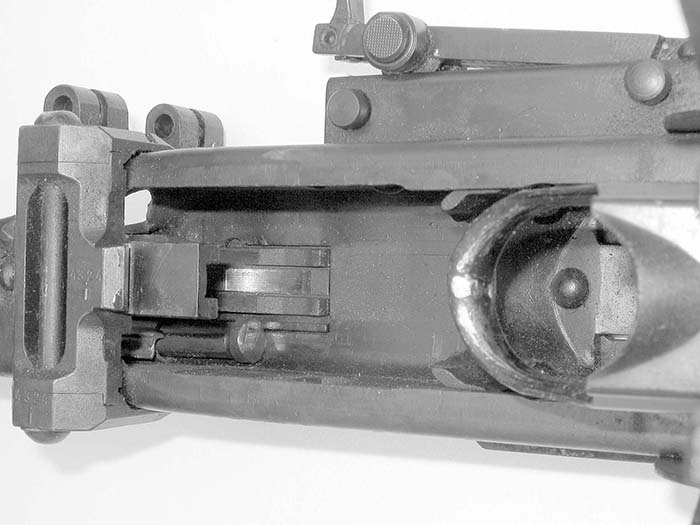
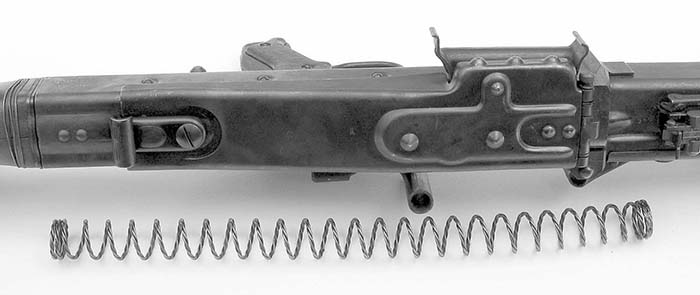
- Recoil spring. The length of the recoil spring should be at least as long as the distance from the rear edge of the receiver to the front edge of the feed tray. Its designed length is 16.9 inches.
- Ejector pin and ejector bar. Make sure the ejector pin is not bent, damaged, or “mushroomed” on the end. When in its extended position, it should extend out to about the front edge of the bolt head. The ejector bar should be straight, without any warps or bends, and should have no chipping.
- Extractor. The extractor should not have any chips in it and have a clean, sharp edge. With the bolt out of the gun, the extractor should securely hold a dummy cartridge in a horizontal position.
- Firing pin and firing pin hole. The firing pin hole needs to be free of dirt, grease, and crud. If it is obstructed, even partially, the firing pin may be prevented from extending out enough to fire the cartridge, or even worse, may remain extended and possibly fire a round out of battery. The firing pin itself should be unbent, smooth with no burrs, and not excessively worn.
- Pressure plate. The pressure plate, which is the finger-like piece in the top cover that directs the cartridge into the chamber, needs to have stiff spring pressure and give much resistance when pushed. The plate cannot be bent at an abnormal angle otherwise the cartridges may hang up going into the chamber. If it is bent too much the round will nose dive into the barrel extension. If bent too little, or has a weak spring, the round will be presented too high into the barrel extension.
- Buffer. Ensure that the buffer head is aligned straight with the buffer spring. This allows the recoil spring to freely slide on the buffer. If the head and buffer spring are misaligned, the recoil spring may get hung up and interfere with the cycling of the gun.
- Booster exit hole. According to the German manual H.Dv. 216/6, the booster exit hole diameter is 11mm for .308 and 11.5mm for 8mm. Although, the MG42 can typically run the larger diameter hole with .308. Doing so will reduce both the rate of fire and the stress imparted on the gun, but may also decrease its reliability.
- Belts. The belts should be free of rust and dirt to ensure that the cartridges are easily stripped free. This is especially critical when using .308 in belts originally designed for 8mm. Until the 8mm belts are fairly used, they can be quite snug for the .308 rounds. If running .308, search out the looser belts by trying to insert a few rounds by hand. A better solution is to use belts specifically designed for .308. An alternative is to employ the proper feed tray and top cover that allow use of the M13 disintegrating links, also commonly referred to as M60 links.
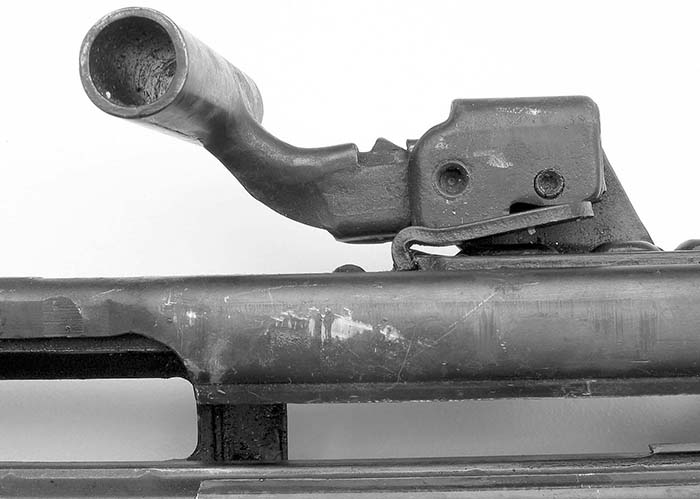
- Ejection port cover spring. The ejection port cover spring needs to be strong enough to keep the ejection port cover fully open. If it is weak, extremely dirty, or covered in grease, it may not hold the ejection port cover open, impeding the expulsion of the empty cases. In the case of a damaged or weak spring, there is the option of just removing the cover and spring completely from the gun as it is unnecessary in a non-combat environment.
- Cocking handle. Make sure the claw part of the cocking handle that latches on to the receiver is not damaged or severely worn. In conjunction, the edge on the receiver where the claw grabs onto needs to also be in good shape and not rounded off. If, during firing, the cocking handle vibrates loose, it may impart some resistance to the traveling bolt, possibly inducing a malfunction.
- .308 conversion parts. When converting from 8mm to .308, some people are willing and able to swap out just the barrels and the gun will run fine. Do yourself a favor and go the whole nine yards by using all of the proper parts. This includes the barrel, booster assembly, feed tray, top cover, and bolt. Granted, some guns can run with only changing out the barrel, but using all of the proper parts reduces the likelihood of malfunctions, especially as the gun gets dirty.
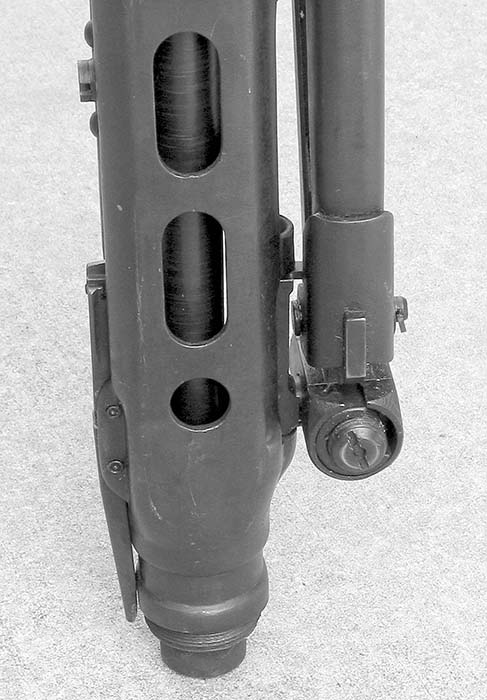
These last few things may not necessarily affect the operation of the gun, but are telltale signs of heavy use.
- Trunnion. Remove the barrel and take a look at the trunnion through the barrel change door. Observe the unlocking ramps, which are the extensions seen on each side of the inside area of the trunnion. There will be some wear on them, but they should not be chipped or damaged. If they are, the trunnion should be replaced by a competent gunsmith.
- Rivets. The rivets that hold the bolt rails, trunnion, buttstock/buffer mounts, grip mount, and recuperator anchor need to be tight. With a lot of shooting, over time they will loosen up.
- Cracking. Over time, cracks may appear in the receiver where the diameter is reduced for the muzzle bearing. Another place where cracks may form is in the web area between the cooling holes. Any cracks are typically a sign of heavy use.
Problem solved
I am sure by now readers are curious as to what happened to our cherished MG42. Was it sold? Banished to the depths of the vault? Thrown in the river? Well, it was none of the above.
After the last miserable outing, and a very long ride home, I was not sure what to do now. It was late in the Saturday evening and I sat down to read the German manuals again. I had a hunch that since I was so excited when they came, I might not have absorbed everything the first time I read them. That hunch turned out to be correct. There, nestled in the pages, was the solution to my problem that I had been overlooking the whole time: the weak dust cover spring. Yep, that was it. It is an unglamorous, boring part that is not even needed for our recreational use of the weapon, but was the cause of my frustration. It turned out that since the spring was weak and covered in grease, it was not holding the dust cover open all the way. As the gun was firing, the vibration would cause the dust cover to close just enough to bounce an ejected case back up into the gun, thereby producing a stoppage. Once I removed the dust cover completely, the gun has never missed a lick. Could all of my frustrations been avoided by just removing the dust cover or replacing its spring the day I got the gun? Possibly. I do believe that the weak recoil spring had something to do with the initial light primer strikes though. But for my sanity, I would like to think that it was a culmination of all of the things that I did. The thought of all of the time wasted on troubleshooting when we could have been shooting is a little disheartening. I just have to consider it as a self-taught, hands-on armorer’s course.
Sources:
MG42 parts and accessories:
RTG Parts
Robert Johnson / RTG Parts
20783 N. 83rd Ave. Suite 103-235
Peoria, Arizona 85382
(623) 362-3459
RobertRTG@earthlink.net
www.robertrtg.com
Translated German ordnance manuals:
John Baum
5678 State Rt. 45
Lisbon, Ohio 44432
John@GermanManuals.Com
www.germanmanuals.com
MG42 gunsmithing services:
Black River Militaria
Robert E. Naess
Rte 131, PO Box 471
Cavendish, VT 05142
(802) 226-7204
BMG17A1@hotmail.com
www.blackrivermilitaria.com
| This article first appeared in Small Arms Review V9N10 (July 2006) |


