By Tracie L. Hill
Once you are lucky enough to own a drum magazine for the Thompson, how do you protect your investment? Believe it or not, this is not too difficult to master. It does not matter if you are going to shoot the drum or save it for investment purposes. You must follow the same path as outlined below.
Maintenance
The most basic element of any drum or mechanical device is to ensure that the mechanism is in good working order. Many times I have seen drum magazines in collections that are pretty to look at, but they could not function due to a variety of reasons. In my opinion, a faultless drum is one that is in great condition (meaning little or no blueing loss and no scratches or dents) and one that can function.

When you first receive a drum, I suggest that you take the drum apart, including removal of the rotor from the drum. To open a Thompson drum magazine, begin by grasping the front winding key and sliding it in the direction of the large hole in the key and lift the key off. With the key removed, the front cover can be lifted off from the body. Don’t be afraid if the two halves of the drum do not come apart easily. The snugness of the fit will depend on how long they have been together and how much dried grease and grime there is.

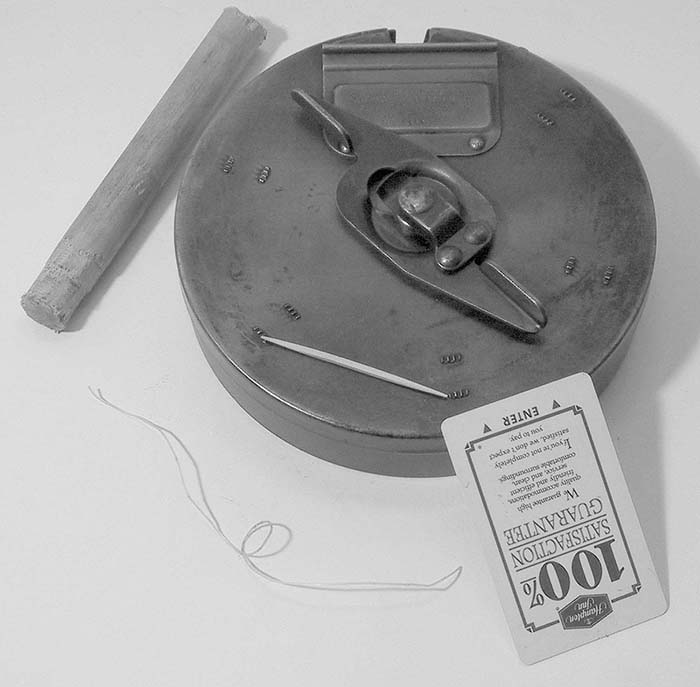
Next, place the body and rotor on a soft surface with the rotor pointing down toward the table. You have to remove the rotor retaining key first to free the rotor from the body of the drum. Most times this is easily accomplished by sliding monofilament fishing line under the key. Usually there is enough space: if not try sliding a wood tooth pick or plastic card under the key to allow the monofilament to go under. With the monofilament in place take a plastic card and position it near the hole in the body into which the key locks.
The plastic cards are something that most everybody already has. You either get them in the mail as “temporary” credit cards or old phone cards or even old hotel room keys that you forgot to leave behind. If you are hard pressed, you can even use your regular Visa or Mastercards.
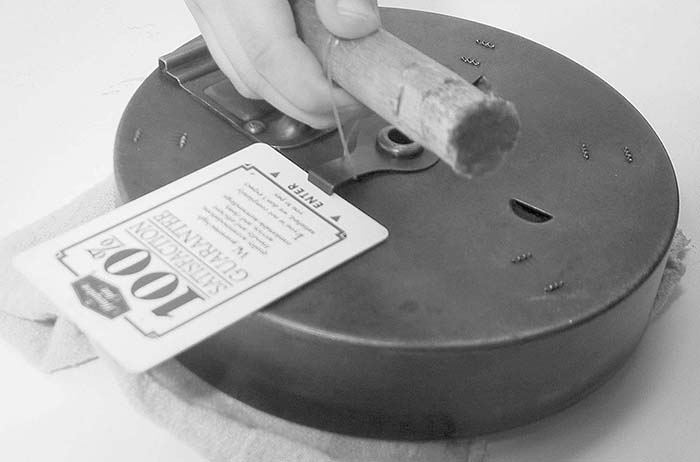
Once the monofilament is under the key, wrap the two ends of the line around a wooden dowel rod. Lift the line via the dowel rod until the key pulls clear of the hole in the body of the drum. Next, slide the plastic card under the key, in-between the body. Now pull the line and the key parallel with the drum body and remove the key. This will free the rotor from the drum body. The plastic card will prevent any scratches being added to the drum body.
With the drum now apart clean all the surfaces. Don’t forget to remove all dirt from the feed lip area of the drum magazine. Once the drum is cleaned, examine the surfaces for any dents, dings or damage. If needed, tools can be made to fit up inside of the drum to act as an anvil to tap against to reform the metal. If the dents are not impeding the function, leave them alone as they will add character. Additionally, it is a good idea not to over work the sheet metal as splitting and cracking of the metal will occur.
With all the repair work completed, reinsert the rotor, but without the retaining key installed. Add the proper amount of ammunition (inert ammo or function test ammo is best for safety) between one set of rotor arms. Then by hand, rotate the rotor and see if the ammunition rotates around the feed rail without any binding. If binding occurs, look for dents or obstructions in this area. If it operates smoothly, replace the drum cover and the winding key and repeat the process. This will tell you if binding occurs with the cover in place.
Next, load the entire drum and repeat the process with the cover and winding key installed, but not the retaining key on the back. Apply pressure on the winding key until the ammo pops up into the feed lips and hold pressure. With your fingers, try to eject the cartridges. The amount of energy to eject the cartridge is very small. If it requires a lot of hand pressure, then there is a problem.
Normally, you will have to examine the area around the feed lips on the cover for a small dent in the radius area between the sidewall and the top. Even a very small dent here can render the drum inoperable. If a dent is found, repair the dent and the drum should function.

Remove the winding key by sliding the key sideways. Then lift the key off. 
Lift the cover off of the body of the drum. There can be some difficulty in removing the cover if the drum has not been disassembled recently. With care the cover will come off. 
Insert the monofilament fishing line under the rotor retaining key on the back of the drum body. If you can not get the line under the key, insert a toothpick under the key to get enough space for the line. 
Wrap the fishing line around a piece of dowel rod. This dowel rod will make a nice handle for the fishing line. 
Lift the tail of the retaining key with the monofilament line and slide the plastic card under the tail. Allow the retaining key tail to rest on the plastic card. 
Pull the key using the line horizontally away from the rotor hub. The key should slide easily across the plastic. Once the key is clear, the rotor can be removed from the drum body. To reassemble simply reverse the above procedures.
Now that the drum is in working order and cleaned and now empty of ammunition, it is time to decide if you are going to shoot the drum again or preserve the drum. If it is a collectable drum and will not be fired, coat the interior of the drum with a good metal preservative (e.g., Rigg, or museum wax or LPS 3) to prevent rust. If you plan on shooting the drum any light oil will work as a lubricant. Then reassemble the rotor into the body.
To reinstall the retaining key on the rotor, start with the plastic card in place over the slot on the body. Then slide the retaining clip into place on the rotor. Then with the monofilament, lift the tail of the clip and gently raise the clip and remove the plastic card and lower the tail into the slot.
Restoration vs Preservation
There are two different schools of thought on any collectable item: whether to preserve an item in its current condition or to restore it to another time period (usually to factory new condition). I am a firm believer in preservation. I believe that the dents and scratches are part of the unique history of the drum or firearm. Too many times someone has restored a drum or gun (meaning reblued or parkerized) only to find out that the drum was a prototype or had a rare marking which was now destroyed. Remember, a refinished drum will not have the value of an original finish drum.
However, there are times when restoration is necessary. This includes, but is not limited to, times when the only way to protect a drum from further damage is to restore the drum completely. When it becomes necessary to restore a drum, please get in touch with a good gunsmith. Not, Billy-Bob who has a parkerizing tank at the hardware store.
Thankfully, there are some very good gunsmiths. One of the best that I have seen in restoration is Merle F. Bitikofer. He has the talent and the skills to replace the rotor springs and to repair almost any damage. He is also the only person I know of that has repeatedly repaired West Hurley C drums to functioning drums. I have also personally seen work by Paul Krough (Diamond K), Craig Jordan, and Stan Andrewski and they perform the work with exceptional care. They also have the blueing process very close to original.
Presentation
Many collectors enjoy displaying their collection for others to enjoy. If the presentation is done correctly the effect on the public can be impressive. Displays such as the ones done by The Thompson Collectors Association at the NRA Annual Meetings, the National Firearms Museums’ display “On The Side Of Law And Order,” and the Colt Collectors display at the Buffalo Bill Museum in Cody, Wyoming are all prime examples. These displays have been seen by tens of thousands of collectors and members of the general public. The result has been nothing but high praise from the media and general public. The fact is, Class III has to do it better than anyone else just to be considered acceptable.
When displaying drums, they should be clean, well oiled and with little rust. I also recommend “whitening up” the markings. This is done by taking a white “China Marker” (a wax type pencil) and softening the tip up by soaking it in lighter fluid for a few seconds and rubbing it into the stampings or engravings. Once the wax dries, wipe off the excess with a cloth with just a bit of a gun solvent and then reapply a top coat of oil or Rigg. The results are a drum with markings that the public can see and read from a distance. The whitening can also be used for photography purposes so that the markings are easier to read. If you want to remove the wax, simply use a worn out tooth brush and some gun solvent and the wax will come right out.
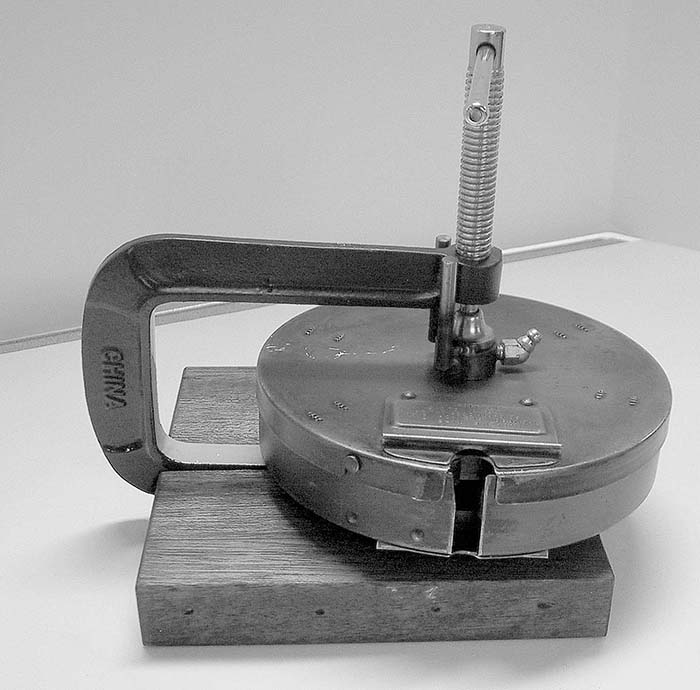
Another suggestion is to use a stand when presenting drum magazines. If the drum is sitting flat on a table it is usually hard to see and read the markings. If it is in a stand it will be upright and at a good reading angle. There are several stands available or you can build them yourself. I like to use the plexiglass “large plate” holders as drum stands. These can be found anywhere collectable plates are sold, at flee markets or antique stores.
Contacts
Merle F. Bitikofer
224 N.W. Woods Lane
Dallas, OR 97338
(503) 623-8294
Diamond K
C/O Paul Krough
1390 E. 7th St.
Delta, CO 81416
(970) 874-5750
Craig Jordan
929 Barr Run Road
Marianna, PA 15345
(412) 267-4585
| This article first appeared in Small Arms Review V9N6 (March 2006) |


